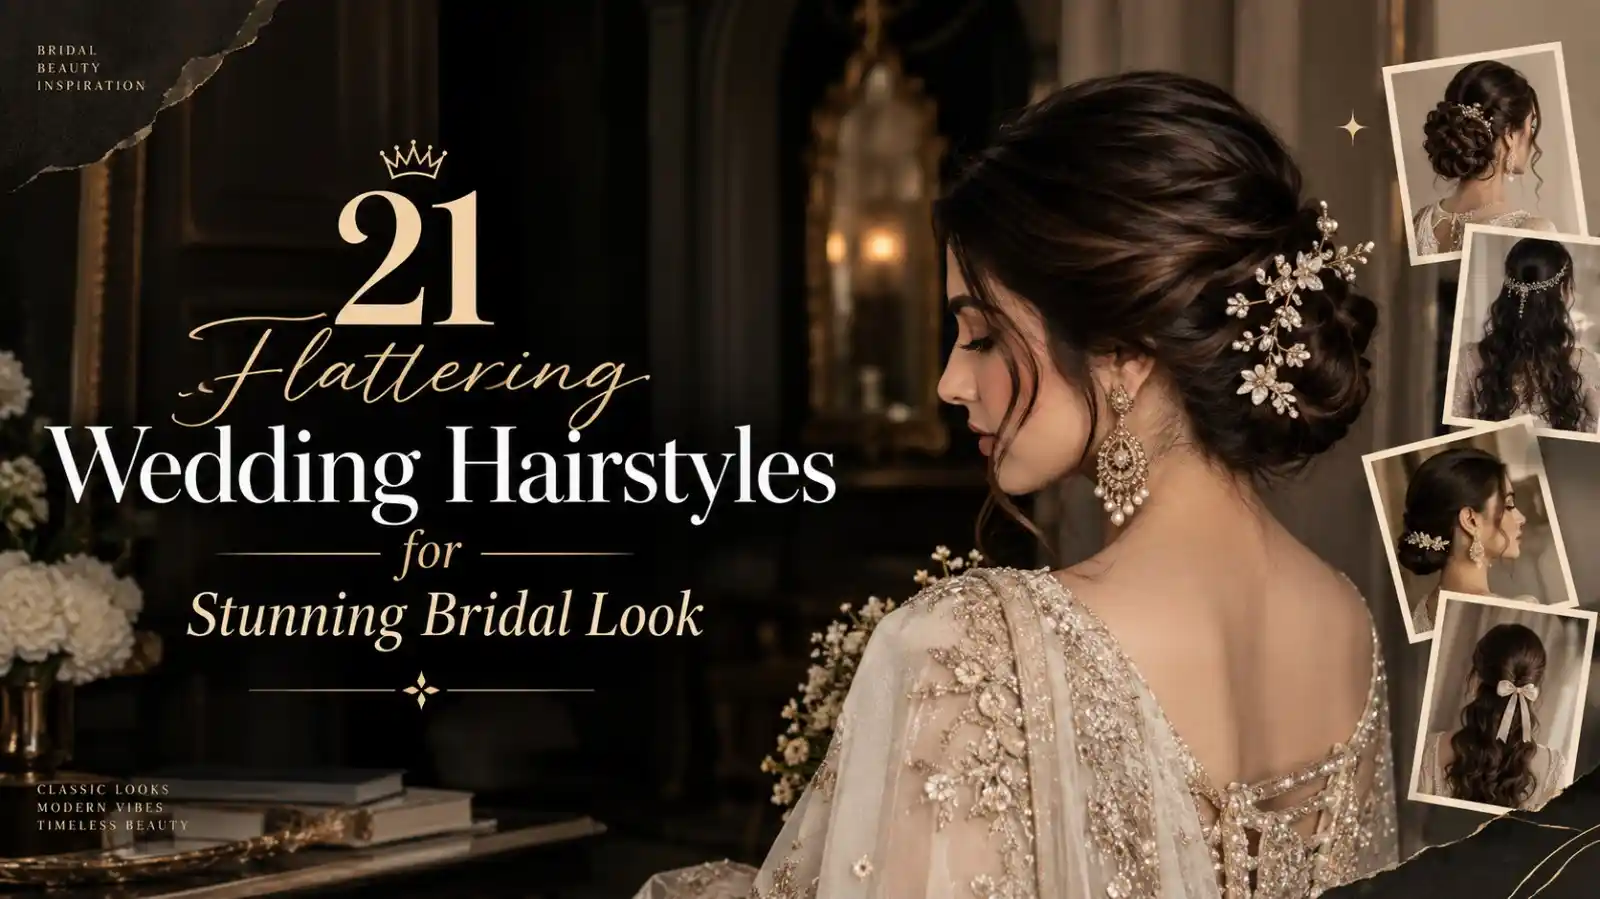
21 Flattering Wedding Hairstyles for Stunning Bridal Look
Your wedding hair should make you feel instantly beautiful ;not stressed about whether it will hold, suit your dress, or photograph well. Flattering wedding hairstyles can turn that uncertainty into a clear, inspiring plan. This guide brings together elegant bridal looks designed for different hair lengths, textures, wedding settings, and personal styles.
Whether you dream of soft waves, a romantic braid, a polished bun, or a modern ponytail, you’ll find ideas by Styled Aura that can help you picture your complete bridal look. I’ve noticed that hairstyles feel most successful when beauty and comfort work together, so these ideas also consider practical styling, hold, accessories, and movement. Save your favorites, compare the details, and take your top choices to your hair trial.
1. Soft Low Chignon
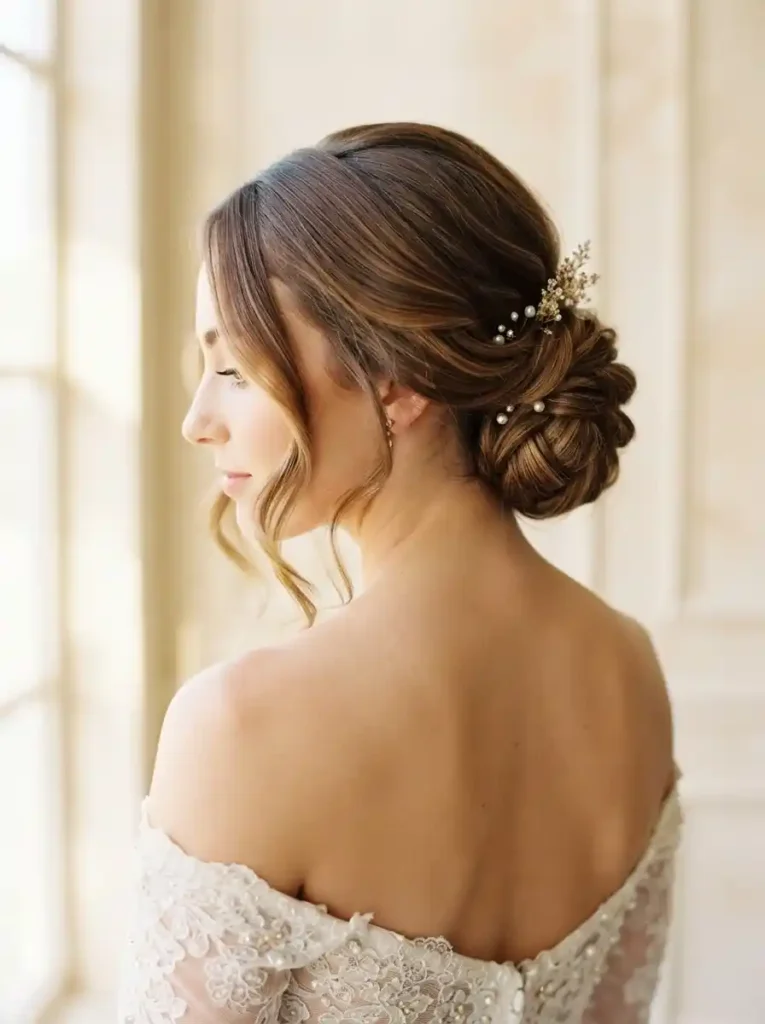
- Creates a polished silhouette without looking overly formal.
- Keeps the neckline and earrings beautifully visible.
- Loose face-framing pieces add softness around the cheeks.
A soft low chignon can make a bridal look feel instantly polished while still keeping it relaxed. The hair sits neatly at the nape, so your neckline, earrings, and veil placement remain easy to showcase. Slightly loosened strands around the face prevent the style from appearing severe, especially when paired with delicate makeup. This shape also photographs beautifully from several angles because the bun creates a clean focal point at the back. In my experience, keeping the twist secure but not painfully tight makes a long wedding day much more comfortable and helps preserve that intentionally effortless finish.
For medium to long hair, this updo offers a practical balance between elegance and staying power. Start with lightly textured hair rather than freshly slippery strands, then smooth the crown and secure the bun close to the nape. A few pearl pins can add sparkle without overwhelming the hairstyle. This is especially useful for outdoor ceremonies, formal receptions, and dresses with open backs or detailed necklines. If your hair is fine, gentle teasing at the crown and a lightweight texturizing spray can create more fullness before pinning, helping the finished chignon look substantial without becoming bulky.
2. Romantic Half-Up Waves

- Adds volume while keeping the hair down and touchable.
- Soft waves frame the face and suit many dress necklines.
- A hidden pin can keep the crown lifted through photos and dancing.
Soft waves and a half-up shape create the kind of bridal hairstyle that looks romantic without feeling overly constructed. The loose lower lengths keep movement around the shoulders, while the lifted crown adds flattering height near the face. This combination works particularly well when you want your hair visible from the front but still want an elegant detail at the back. The waves can also soften angular features and complement both strapless and higher-neck dresses. I’ve noticed that brushing the finished curls gently with your fingers creates a more natural texture than leaving every wave sharply defined.
This style is a strong choice when you want versatility throughout the celebration. The pinned upper section keeps hair away from the eyes and gives a secure place for a small crystal accessory, while the remaining waves can move naturally during photographs and dancing. Use a medium-barrel iron on dry hair, alternating directions for a less uniform finish, then let the curls cool before loosening them. A light flexible hairspray is usually enough for hold without stiffness. For humid venues, smoothing a tiny amount of anti-frizz cream over the ends can help the waves stay glossy and controlled.
3. Braided Crown Updo
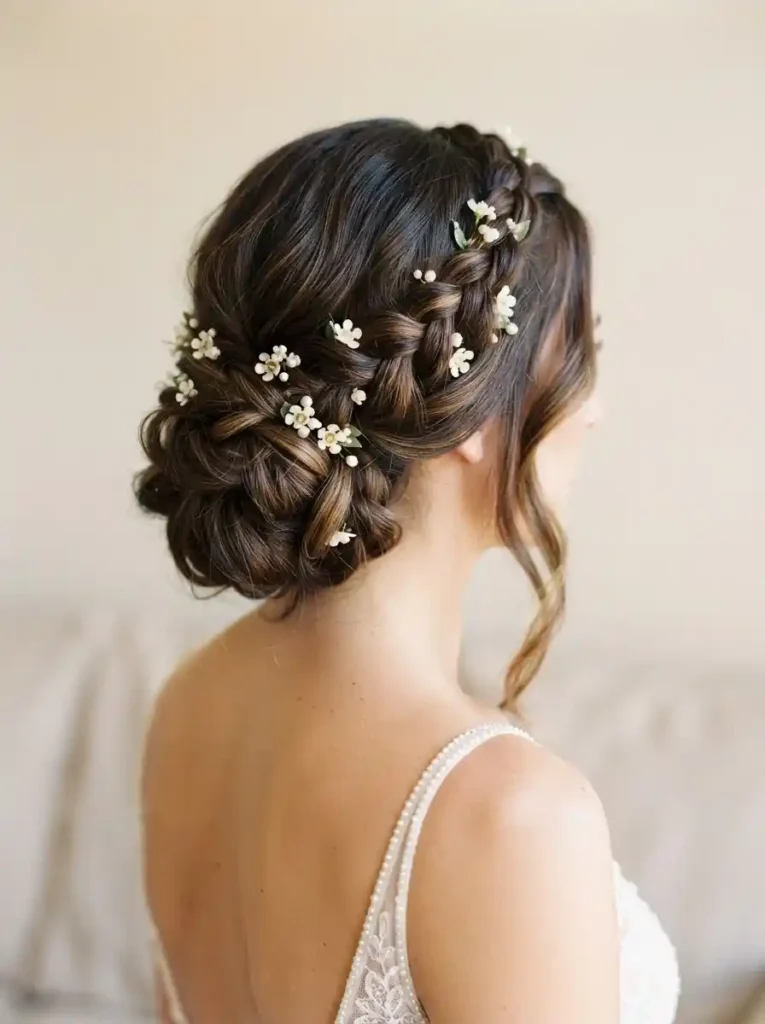
- Creates a graceful frame around the head and keeps longer layers contained.
- Braiding adds texture that remains visible in photographs.
- Works beautifully with floral pins, tiny pearls, or a delicate veil.
A braided crown updo brings texture and structure together in one graceful shape. The braids create a natural frame around the head, while the tucked-up lengths keep the overall silhouette neat and wedding-ready. It is especially flattering when you want detail visible from the side rather than relying on a large accessory. The woven texture also gives fine or medium-density hair more visual dimension. That’s why many hairstylists recommend adding gentle waves or texture before braiding: the sections grip better, the braid looks fuller, and small flyaways are easier to control without making the finish appear stiff.
This updo works especially well for garden ceremonies, rustic venues, and dresses with romantic lace details. Begin with lightly waved hair, divide two front sections, and create relaxed three-strand braids toward the back. Pin them securely before gathering the remaining hair into a low textured bun. Leave a few fine pieces near the temples if you prefer softness around the face. For extra durability, place pins underneath the braid rather than directly on top where they may show. A discreet veil can slide beneath the braided crown, while tiny floral pins can emphasize the woven texture without competing with it.
4. Sleek Bridal Ponytail

- Creates a clean, lifted shape that highlights the face.
- Keeps long hair controlled while preserving plenty of length.
- Looks especially striking with statement earrings or a detailed neckline.
A sleek bridal ponytail brings modern polish to a wedding hairstyle while keeping the overall look surprisingly simple. The smooth crown draws attention upward, creating a lifted appearance around the face, while the long ponytail adds movement and length behind the shoulders. This shape is particularly useful when your dress already has dramatic details and you want your hair to provide clean contrast. Flattering wedding hairstyles do not always need elaborate twists or layers; sometimes a precise finish makes the strongest impression. In my experience, smoothing the crown carefully before securing the ponytail makes the style look much more professional in photographs.
This hairstyle works best on medium to long hair, especially when you want a contemporary alternative to a traditional updo. Use a smoothing brush and lightweight serum to control the crown, then secure the ponytail firmly at the chosen height. Wrapping a small section of hair around the elastic instantly makes the finish look more refined. If your hair tends to lose volume, backcomb the base slightly before smoothing the surface. A flexible finishing spray can help manage flyaways without making the hair crunchy. Pair the look with crystal earrings, a simple veil, or a minimalist dress for a balanced modern bridal appearance.
5. Side-Swept Hollywood Waves
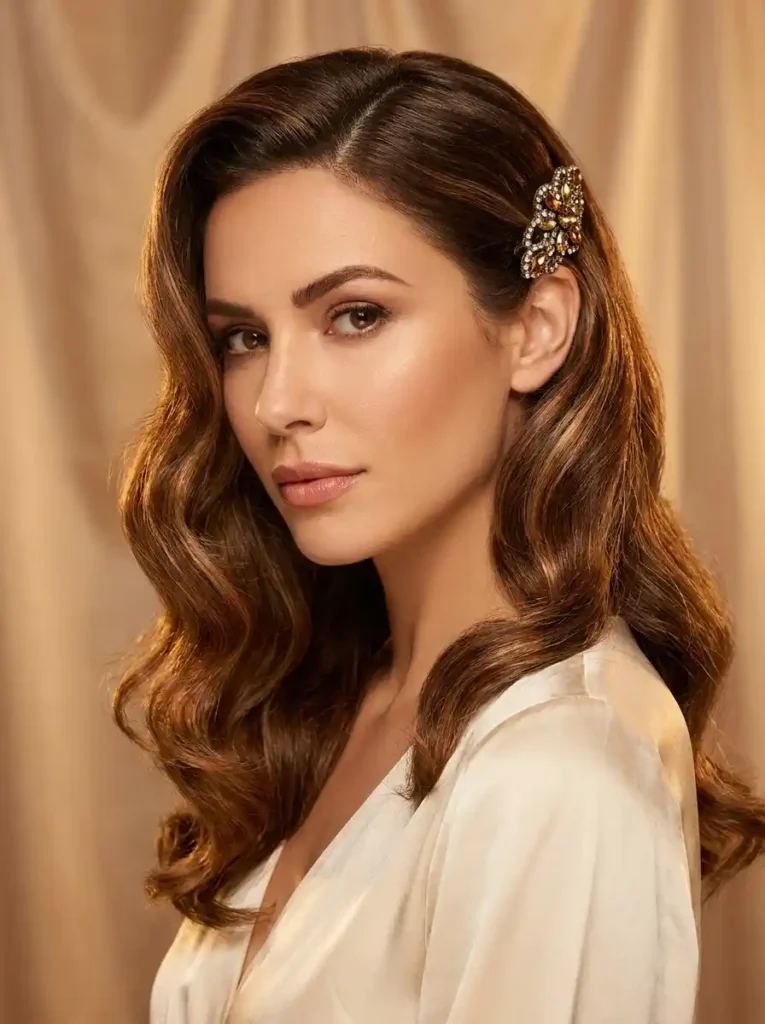
- Adds glamorous movement without requiring an elaborate updo.
- The deep side part creates instant volume around the face.
- Works beautifully with vintage-inspired dresses and statement earrings.
Few hairstyles create instant glamour quite like polished side-swept waves. The deep side part gives the roots noticeable lift, while sculpted waves create a smooth rhythm through the lengths. Sweeping most of the hair over one shoulder also opens the opposite side of the face, making statement earrings especially visible. This style is ideal when you want your wedding hair to feel sophisticated rather than heavily decorated. I’ve seen this style work beautifully for many people because the structured wave pattern photographs clearly, even when viewed from a distance, while the glossy finish adds a refined touch without needing complicated accessories.
For the best result, start with completely dry hair and apply a heat protectant before creating curls with a medium or large barrel. Let each section cool fully before brushing through it, because cooling helps the wave pattern hold its shape. Create a deep side part, then carefully brush the curls into continuous waves rather than separate ringlets. Secure the swept side discreetly behind the ear if needed. This look suits evening receptions, ballroom venues, and satin or fitted gowns particularly well. A lightweight shine spray can finish the style, but avoid heavy oils that may flatten the carefully created volume.
6. Pearl-Adorned Bun

- Gives a classic bun a delicate bridal update.
- Pearls add detail without competing with the dress.
- The compact shape is practical for veils and long celebrations.
A pearl-adorned bun turns a simple low updo into a refined bridal statement with very little visual clutter. The compact shape keeps the hair controlled at the nape, while scattered pearls introduce tiny points of light that become noticeable in close photographs. This is an excellent option when your dress, veil, or jewelry already carries intricate details and you want your hairstyle to remain elegant rather than overwhelming. The smooth crown also creates a clean foundation for accessories. In my experience, placing pearls unevenly often looks more natural than creating a perfectly symmetrical pattern, especially when the bun itself has soft texture.
This style is practical for ceremonies where you need your hair to stay secure for several hours. Prepare the hair with light texture, gather it low, and twist the lengths into a compact bun before anchoring it with strong pins. Once the shape is secure, place pearl pins through different sections rather than clustering them in one area. This distributes the decoration and helps the bun look balanced from multiple angles. A veil can be positioned above or beneath the bun depending on the desired effect. For outdoor weddings, finish with flexible hairspray to help protect the smooth surface from small flyaways and humidity.
7. Textured Low Ponytail
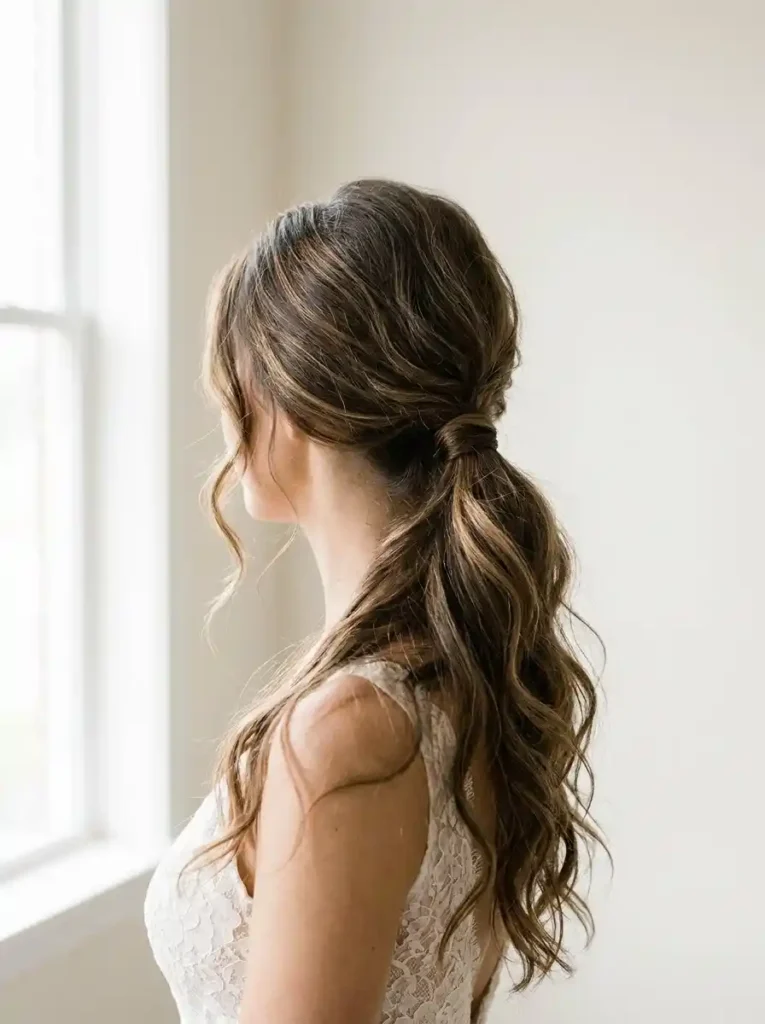
- Adds relaxed volume while keeping the overall shape polished.
- Works especially well with fine or medium-density hair.
- Leaves the neckline open for delicate jewelry or statement earrings.
A textured low ponytail offers an effortless alternative when a traditional bun feels too formal. The crown has gentle lift, while softly waved lengths create movement without looking messy or unfinished. Keeping the ponytail low also leaves plenty of space around the neck and shoulders, making it especially attractive with delicate necklaces, open-back gowns, or statement earrings. The style can feel relaxed during an outdoor ceremony yet polished enough for a formal reception. I’ve noticed that adding texture before securing the ponytail gives the hair more body and helps prevent the finished shape from looking flat or overly tight.
For a dependable finish, begin by creating loose waves through the lengths and lightly teasing the crown near the roots. Smooth the surface with your fingers rather than a dense brush so the texture remains visible. Gather the hair at the nape and secure it with a strong elastic, then wrap a small section around the base to hide it. A few delicate pieces can remain around the temples for softness. This style is particularly useful for long celebrations because the ponytail stays away from the face while retaining movement. Finish with flexible hairspray to maintain texture without sacrificing natural bounce.
8. Twisted Half-Up Style
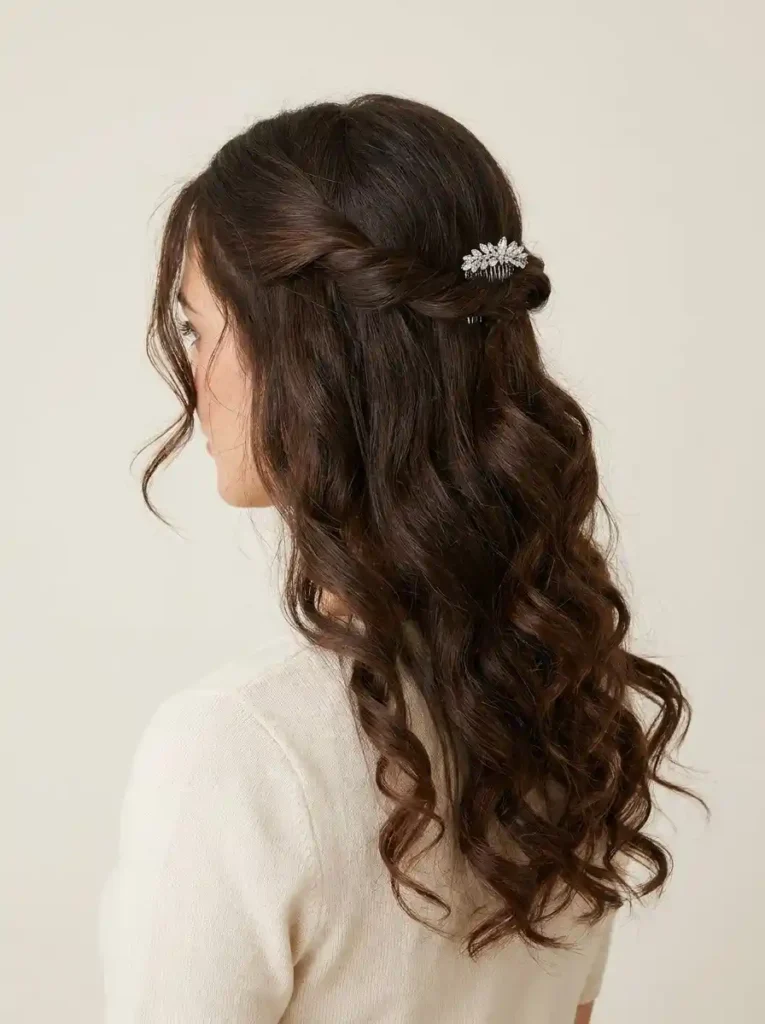
- Combines the freedom of loose hair with a secure, polished crown.
- Twisted sections add detail without requiring complex braiding.
- A small comb or jeweled clip can personalize the finished look.
A twisted half-up hairstyle gives you the best of both worlds: open flowing lengths with enough structure to keep the upper sections controlled. Two softly twisted pieces meet at the back, creating a simple detail that looks beautiful from behind without making the style feel complicated. Loose curls through the lower hair add movement and help soften the overall shape around the shoulders. This option is especially flattering when you want your natural length to remain visible. In my experience, gently loosening the twists after securing them creates a fuller appearance and prevents the crown from looking overly slick or compressed.
This style can easily move from ceremony to reception with a few thoughtful adjustments. Curl the lower lengths first, allowing the sections to cool before gently separating them. Then twist each side backward, crossing and pinning the sections securely at the center. A crystal comb can cover the pins while adding a subtle bridal accent. For finer hair, lightly tease the crown before twisting to create additional body. This look pairs beautifully with flowing gowns, lace dresses, and soft floral bouquets. If your ceremony is outdoors, use a flexible setting spray and keep a few spare pins available for quick touch-ups after photographs.
9. Classic French Twist

- Creates a timeless vertical shape that elongates the head and neck.
- Keeps every layer neatly contained during formal celebrations.
- Provides an elegant foundation for veils, combs, or pearl accessories.
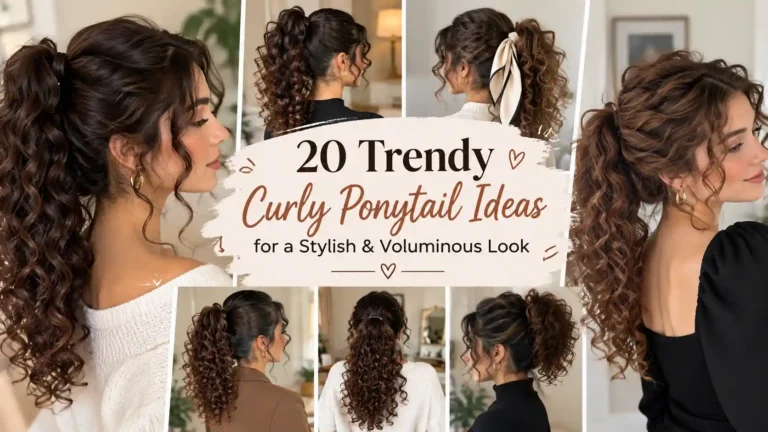
The classic French twist remains a beautiful choice when you want your bridal hairstyle to look refined from every angle. Its vertical shape draws the eye upward, creating a graceful line through the head and neck while keeping the hair securely tucked away. Unlike a loose bun, the twist has a more streamlined silhouette that pairs naturally with structured gowns and formal accessories. This makes it one of the most versatile flattering wedding hairstyles for an elegant ceremony. A hairstylist can also adjust the amount of crown volume, allowing the same basic shape to look sleek, softly textured, or slightly more dramatic.
Preparation makes a noticeable difference with this style, especially when the hair is very clean and slippery. Adding a small amount of texturizing product gives the strands enough grip to stay folded into the twist. Brush the hair smoothly toward the back, gather it low, then roll the lengths upward while tucking the ends inside. Secure the twist with several pins placed underneath the outer layer. A pearl comb or delicate veil can be added once the structure feels stable. This hairstyle works particularly well for formal venues, evening receptions, and dresses with high necklines or intricate shoulder details.
10. Soft Low Chignon
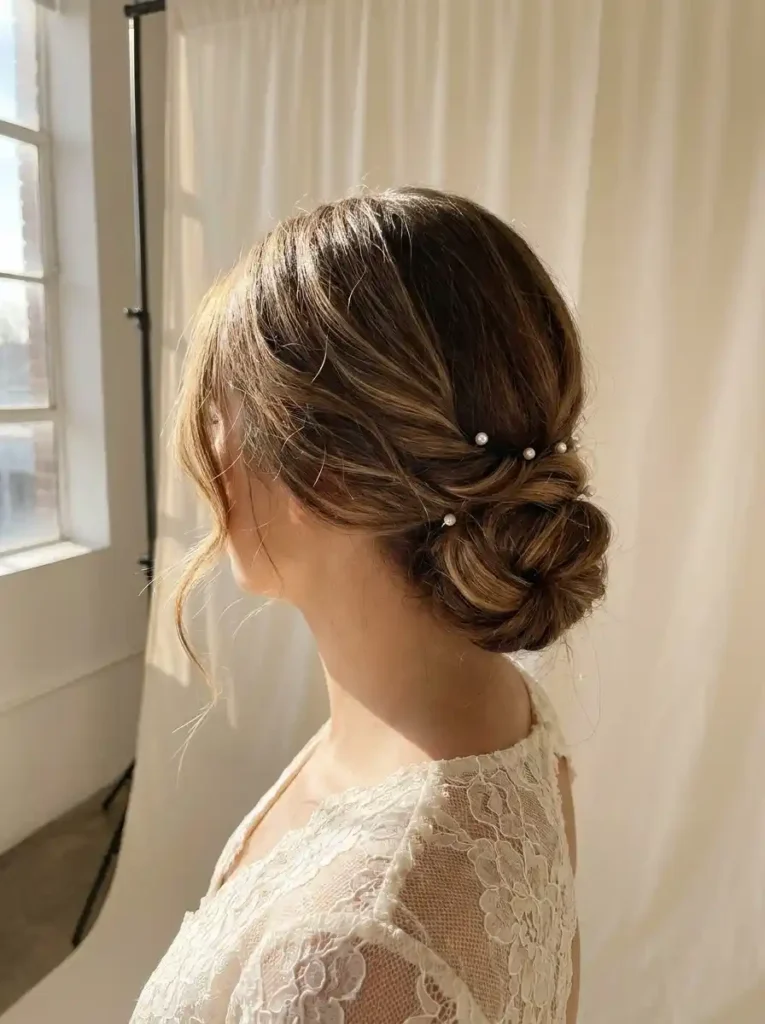
- Creates a polished silhouette without looking overly formal.
- Keeps the neckline and earrings beautifully visible.
- Loose face-framing pieces add softness around the cheeks.
A soft low chignon can make a bridal look feel instantly polished while still keeping it relaxed. The hair sits neatly at the nape, so your neckline, earrings, and veil placement remain easy to showcase. Slightly loosened strands around the face prevent the style from appearing severe, especially when paired with delicate makeup. This shape also photographs beautifully from several angles because the bun creates a clean focal point at the back. In my experience, keeping the twist secure but not painfully tight makes a long wedding day much more comfortable and helps preserve that intentionally effortless finish.
For medium to long hair, this updo offers a practical balance between elegance and staying power. Start with lightly textured hair rather than freshly slippery strands, then smooth the crown and secure the bun close to the nape. A few pearl pins can add sparkle without overwhelming the hairstyle. This is especially useful for outdoor ceremonies, formal receptions, and dresses with open backs or detailed necklines. If your hair is fine, gentle teasing at the crown and a lightweight texturizing spray can create more fullness before pinning, helping the finished chignon look substantial without becoming bulky.
11. Romantic Half-Up Waves

- Adds volume while keeping the hair down and touchable.
- Soft waves frame the face and suit many dress necklines.
- A hidden pin can keep the crown lifted through photos and dancing.
Soft waves and a half-up shape create the kind of bridal hairstyle that looks romantic without feeling overly constructed. The loose lower lengths keep movement around the shoulders, while the lifted crown adds flattering height near the face. This combination works particularly well when you want your hair visible from the front but still want an elegant detail at the back. The waves can also soften angular features and complement both strapless and higher-neck dresses. I’ve noticed that brushing the finished curls gently with your fingers creates a more natural texture than leaving every wave sharply defined.
This style is a strong choice when you want versatility throughout the celebration. The pinned upper section keeps hair away from the eyes and gives a secure place for a small crystal accessory, while the remaining waves can move naturally during photographs and dancing. Use a medium-barrel iron on dry hair, alternating directions for a less uniform finish, then let the curls cool before loosening them. A light flexible hairspray is usually enough for hold without stiffness. For humid venues, smoothing a tiny amount of anti-frizz cream over the ends can help the waves stay glossy and controlled.
12. Braided Crown Updo
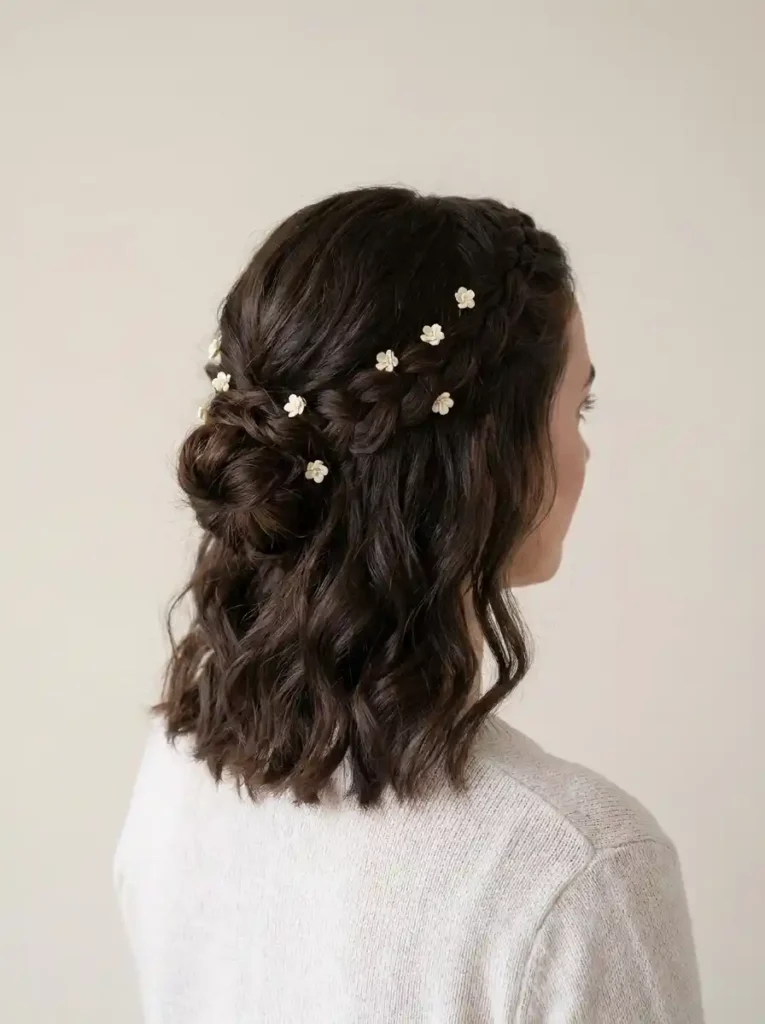
- Creates a graceful frame around the head and keeps longer layers contained.
- Braiding adds texture that remains visible in photographs.
- Works beautifully with floral pins, tiny pearls, or a delicate veil.
A braided crown updo brings texture and structure together in one graceful shape. The braids create a natural frame around the head, while the tucked-up lengths keep the overall silhouette neat and wedding-ready. It is especially flattering when you want detail visible from the side rather than relying on a large accessory. The woven texture also gives fine or medium-density hair more visual dimension. That’s why many hairstylists recommend adding gentle waves or texture before braiding: the sections grip better, the braid looks fuller, and small flyaways are easier to control without making the finish appear stiff.
This updo works especially well for garden ceremonies, rustic venues, and dresses with romantic lace details. Begin with lightly waved hair, divide two front sections, and create relaxed three-strand braids toward the back. Pin them securely before gathering the remaining hair into a low textured bun. Leave a few fine pieces near the temples if you prefer softness around the face. For extra durability, place pins underneath the braid rather than directly on top where they may show. A discreet veil can slide beneath the braided crown, while tiny floral pins can emphasize the woven texture without competing with it.
13. Sleek Bridal Ponytail
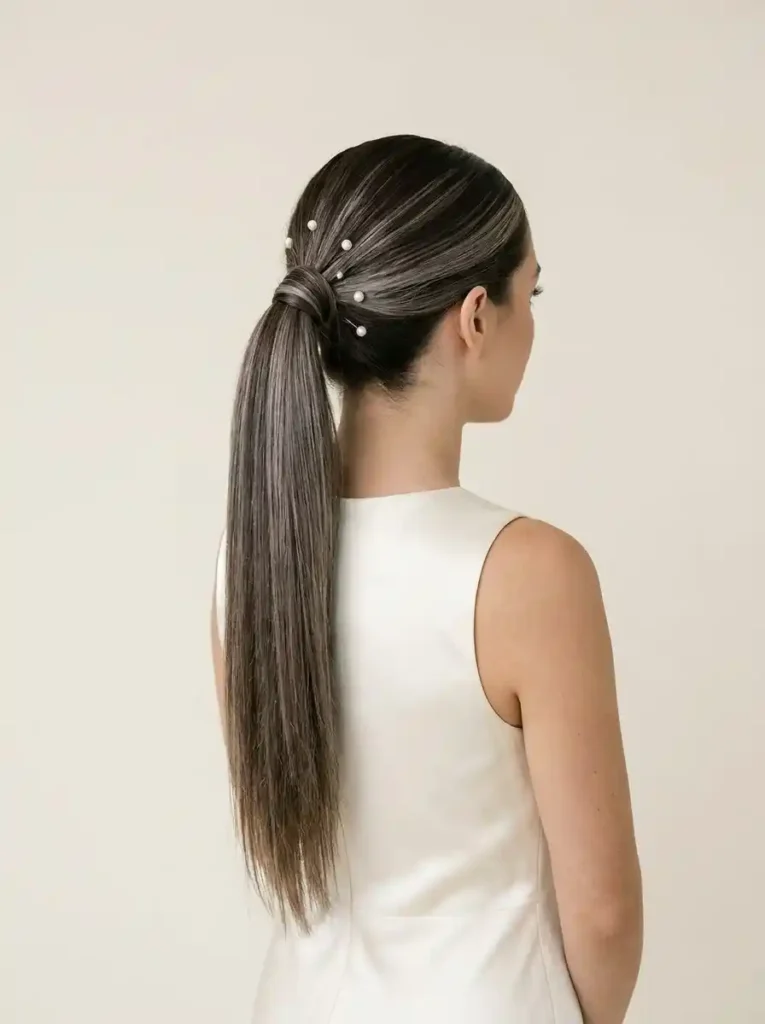
- Creates a clean, lifted shape that highlights the face.
- Keeps long hair controlled while preserving plenty of length.
- Looks especially striking with statement earrings or a detailed neckline.
A sleek bridal ponytail brings modern polish to a wedding hairstyle while keeping the overall look surprisingly simple. The smooth crown draws attention upward, creating a lifted appearance around the face, while the long ponytail adds movement and length behind the shoulders. This shape is particularly useful when your dress already has dramatic details and you want your hair to provide clean contrast. Flattering wedding hairstyles do not always need elaborate twists or layers; sometimes a precise finish makes the strongest impression. In my experience, smoothing the crown carefully before securing the ponytail makes the style look much more professional in photographs.
This hairstyle works best on medium to long hair, especially when you want a contemporary alternative to a traditional updo. Use a smoothing brush and lightweight serum to control the crown, then secure the ponytail firmly at the chosen height. Wrapping a small section of hair around the elastic instantly makes the finish look more refined. If your hair tends to lose volume, backcomb the base slightly before smoothing the surface. A flexible finishing spray can help manage flyaways without making the hair crunchy. Pair the look with crystal earrings, a simple veil, or a minimalist dress for a balanced modern bridal appearance.
14. Side-Swept Hollywood Waves

- Adds glamorous movement without requiring an elaborate updo.
- The deep side part creates instant volume around the face.
- Works beautifully with vintage-inspired dresses and statement earrings.
Few hairstyles create instant glamour quite like polished side-swept waves. The deep side part gives the roots noticeable lift, while sculpted waves create a smooth rhythm through the lengths. Sweeping most of the hair over one shoulder also opens the opposite side of the face, making statement earrings especially visible. This style is ideal when you want your wedding hair to feel sophisticated rather than heavily decorated. I’ve seen this style work beautifully for many people because the structured wave pattern photographs clearly, even when viewed from a distance, while the glossy finish adds a refined touch without needing complicated accessories.
For the best result, start with completely dry hair and apply a heat protectant before creating curls with a medium or large barrel. Let each section cool fully before brushing through it, because cooling helps the wave pattern hold its shape. Create a deep side part, then carefully brush the curls into continuous waves rather than separate ringlets. Secure the swept side discreetly behind the ear if needed. This look suits evening receptions, ballroom venues, and satin or fitted gowns particularly well. A lightweight shine spray can finish the style, but avoid heavy oils that may flatten the carefully created volume.
15. Pearl-Adorned Bun
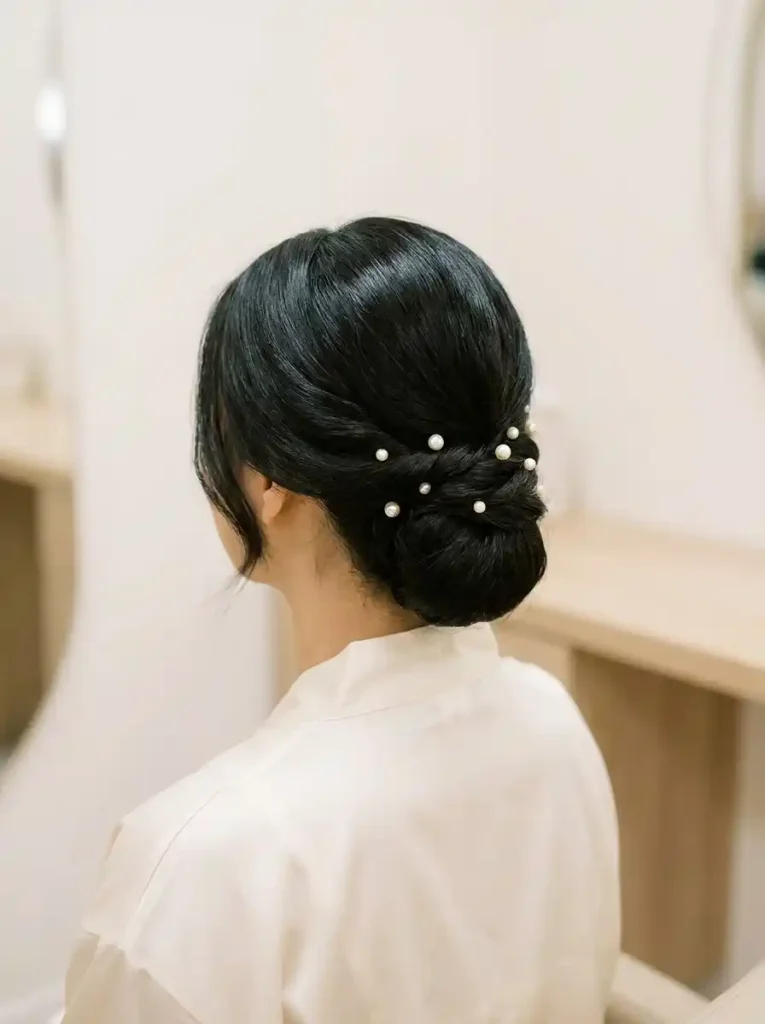
- Gives a classic bun a delicate bridal update.
- Pearls add detail without competing with the dress.
- The compact shape is practical for veils and long celebrations.
A pearl-adorned bun turns a simple low updo into a refined bridal statement with very little visual clutter. The compact shape keeps the hair controlled at the nape, while scattered pearls introduce tiny points of light that become noticeable in close photographs. This is an excellent option when your dress, veil, or jewelry already carries intricate details and you want your hairstyle to remain elegant rather than overwhelming. The smooth crown also creates a clean foundation for accessories. In my experience, placing pearls unevenly often looks more natural than creating a perfectly symmetrical pattern, especially when the bun itself has soft texture.
This style is practical for ceremonies where you need your hair to stay secure for several hours. Prepare the hair with light texture, gather it low, and twist the lengths into a compact bun before anchoring it with strong pins. Once the shape is secure, place pearl pins through different sections rather than clustering them in one area. This distributes the decoration and helps the bun look balanced from multiple angles. A veil can be positioned above or beneath the bun depending on the desired effect. For outdoor weddings, finish with flexible hairspray to help protect the smooth surface from small flyaways and humidity.
16. Textured Low Ponytail
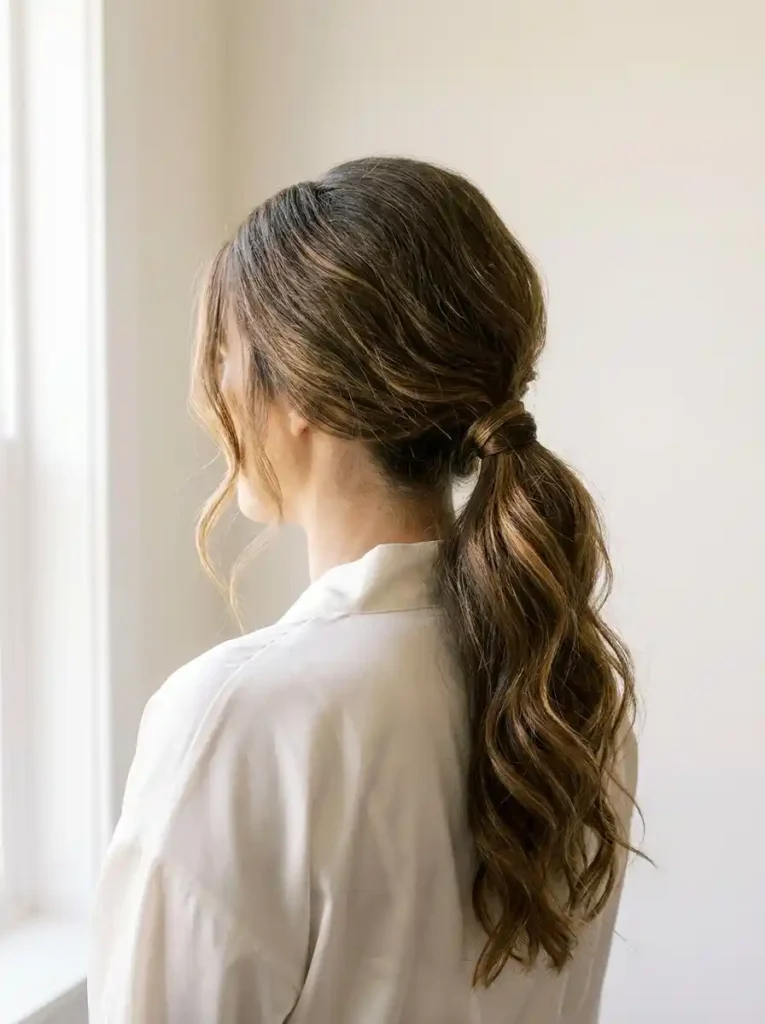
- Adds relaxed volume while keeping the overall shape polished.
- Works especially well with fine or medium-density hair.
- Leaves the neckline open for delicate jewelry or statement earrings.
A textured low ponytail offers an effortless alternative when a traditional bun feels too formal. The crown has gentle lift, while softly waved lengths create movement without looking messy or unfinished. Keeping the ponytail low also leaves plenty of space around the neck and shoulders, making it especially attractive with delicate necklaces, open-back gowns, or statement earrings. The style can feel relaxed during an outdoor ceremony yet polished enough for a formal reception. I’ve noticed that adding texture before securing the ponytail gives the hair more body and helps prevent the finished shape from looking flat or overly tight.
For a dependable finish, begin by creating loose waves through the lengths and lightly teasing the crown near the roots. Smooth the surface with your fingers rather than a dense brush so the texture remains visible. Gather the hair at the nape and secure it with a strong elastic, then wrap a small section around the base to hide it. A few delicate pieces can remain around the temples for softness. This style is particularly useful for long celebrations because the ponytail stays away from the face while retaining movement. Finish with flexible hairspray to maintain texture without sacrificing natural bounce.
17. Twisted Half-Up Style
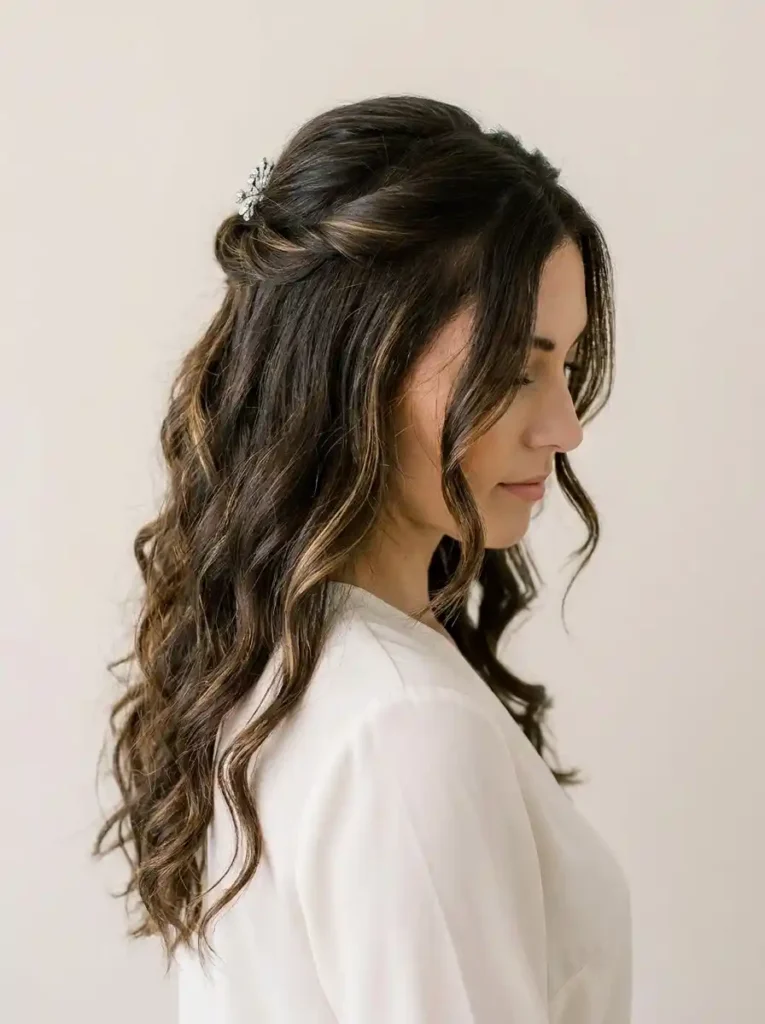
- Combines the freedom of loose hair with a secure, polished crown.
- Twisted sections add detail without requiring complex braiding.
- A small comb or jeweled clip can personalize the finished look.
A twisted half-up hairstyle gives you the best of both worlds: open flowing lengths with enough structure to keep the upper sections controlled. Two softly twisted pieces meet at the back, creating a simple detail that looks beautiful from behind without making the style feel complicated. Loose curls through the lower hair add movement and help soften the overall shape around the shoulders. This option is especially flattering when you want your natural length to remain visible. In my experience, gently loosening the twists after securing them creates a fuller appearance and prevents the crown from looking overly slick or compressed.
This style can easily move from ceremony to reception with a few thoughtful adjustments. Curl the lower lengths first, allowing the sections to cool before gently separating them. Then twist each side backward, crossing and pinning the sections securely at the center. A crystal comb can cover the pins while adding a subtle bridal accent. For finer hair, lightly tease the crown before twisting to create additional body. This look pairs beautifully with flowing gowns, lace dresses, and soft floral bouquets. If your ceremony is outdoors, use a flexible setting spray and keep a few spare pins available for quick touch-ups after photographs.
18. Classic French Twist
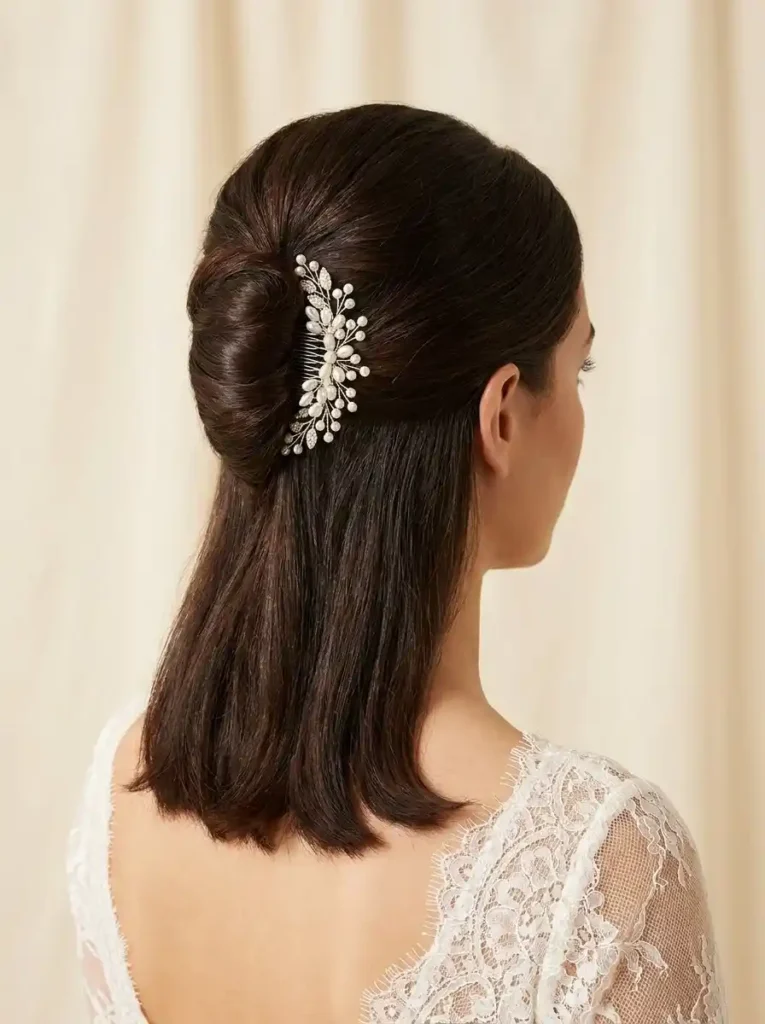
- Creates a timeless vertical shape that elongates the head and neck.
- Keeps every layer neatly contained during formal celebrations.
- Provides an elegant foundation for veils, combs, or pearl accessories.
The classic French twist remains a beautiful choice when you want your bridal hairstyle to look refined from every angle. Its vertical shape draws the eye upward, creating a graceful line through the head and neck while keeping the hair securely tucked away. Unlike a loose bun, the twist has a more streamlined silhouette that pairs naturally with structured gowns and formal accessories. This makes it one of the most versatile flattering wedding hairstyles for an elegant ceremony. A hairstylist can also adjust the amount of crown volume, allowing the same basic shape to look sleek, softly textured, or slightly more dramatic.
Preparation makes a noticeable difference with this style, especially when the hair is very clean and slippery. Adding a small amount of texturizing product gives the strands enough grip to stay folded into the twist. Brush the hair smoothly toward the back, gather it low, then roll the lengths upward while tucking the ends inside. Secure the twist with several pins placed underneath the outer layer. A pearl comb or delicate veil can be added once the structure feels stable. This hairstyle works particularly well for formal venues, evening receptions, and dresses with high necklines or intricate shoulder details.
19. Loose Bridal Braid

- Adds visible texture while keeping long hair beautifully organized.
- A relaxed braid gives a softer alternative to formal updos.
- Works well with flowers, ribbons, or tiny decorative pins.
A loose bridal braid brings texture, movement, and softness together in a hairstyle that feels romantic without appearing overly arranged. The braid can rest over one shoulder, allowing its woven pattern to remain visible in photographs while keeping longer hair organized throughout the celebration. Gently loosened sections make the braid appear fuller and prevent it from looking too tight against the head. This is particularly useful for naturally wavy or thick hair, where texture can become part of the finished design. I’ve seen this style work beautifully for outdoor weddings because small changes in texture actually enhance its relaxed, intentional appearance.
For a lasting result, create gentle waves before beginning the braid rather than braiding completely straight hair. The added texture gives the sections more grip and makes the finished plait look noticeably fuller. Begin near the nape or slightly higher depending on how much volume you want around the crown, then braid loosely toward one shoulder. Secure the end with a discreet elastic and carefully pull small sections outward to soften the shape. Tiny flowers or narrow ribbons can be woven through the braid for personalization. A flexible hairspray helps hold the structure while allowing the lengths to retain natural movement.
20. Voluminous Curled Updo
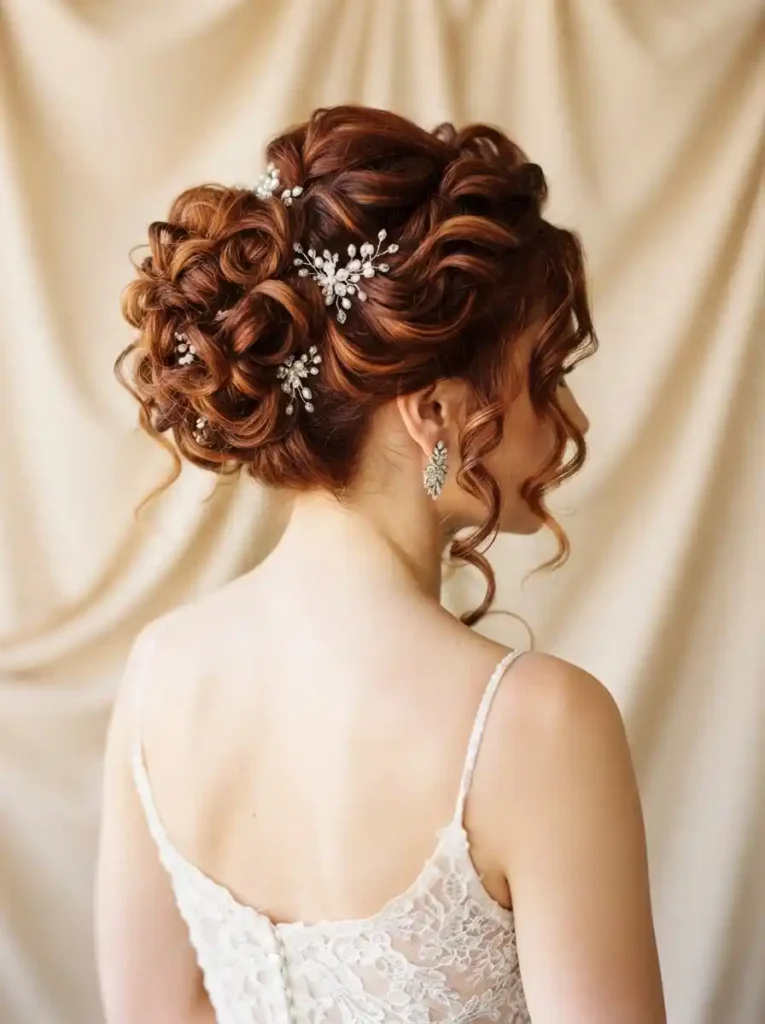
- Builds noticeable height and fullness for a glamorous bridal silhouette.
- Curled sections create dimension throughout the back of the hairstyle.
- Particularly useful for medium-length hair that needs extra visual volume.
A voluminous curled updo is ideal when you want your wedding hair to feel glamorous, dimensional, and noticeably full. The lifted crown creates height, while curled sections tucked into the updo give the back of the hairstyle plenty of visual interest. Face-framing tendrils soften the structure so the finished look does not feel overly rigid. This approach can be especially helpful for medium-length hair because carefully placed curls create the impression of greater fullness without requiring extremely long layers. In my experience, building volume gradually with smaller sections gives an updo better structure than trying to create maximum height all at once.
The secret to making this style look elegant rather than bulky is controlled texture. Apply heat protectant, curl sections individually, and allow each curl to cool before pinning it into place. Light teasing underneath the crown can provide additional lift, while smoothing only the surface keeps the overall finish polished. Secure each curled section with hidden pins, checking the shape from the front, side, and back before adding accessories. Crystal pins work well when you want subtle sparkle. This hairstyle suits formal receptions, ballroom venues, and dramatic gowns particularly well, especially when you want the hair to remain a major part of the overall look.
21. Floral Braided Updo
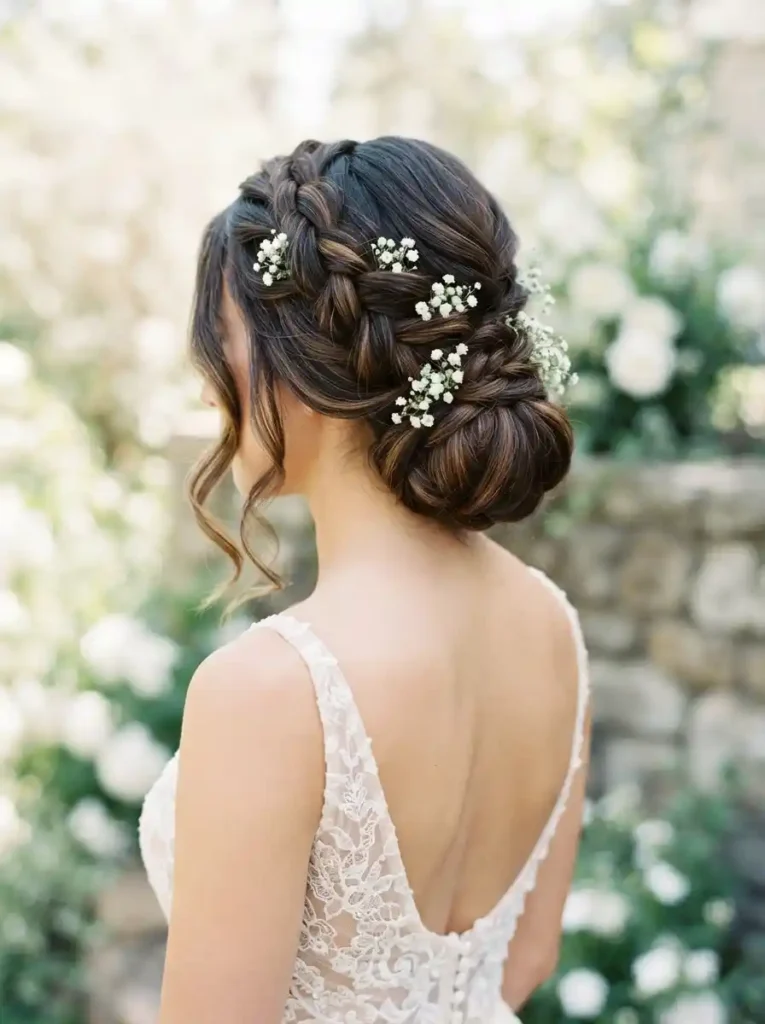
- Blends woven texture with a secure, elegant updo.
- Small flowers create a fresh detail without overwhelming the hairstyle.
- Keeps longer hair contained while maintaining a soft romantic shape.
A floral braided updo combines the security of an updo with the delicate texture of a braid, making it especially appealing for romantic wedding settings. Braided sections add definition across the back of the head, while a low rounded bun keeps the lengths contained and comfortable. Small flowers tucked between the woven sections create visual detail without requiring heavy jewelry or oversized accessories. This balance makes the style easy to adapt to different dresses and wedding themes. That’s why many hairstylists recommend using lightweight floral accents rather than dense arrangements, which can weigh down the hair and hide the braid’s texture.
For a secure finish, prepare the hair with gentle waves and a small amount of texturizing spray before separating the sections. Create relaxed braids on each side, then bring them toward the back and incorporate the remaining lengths into a low bun. Pin the structure from underneath so the fastenings stay hidden. Add tiny flowers only after the hairstyle is completely secure, spacing them naturally rather than creating one concentrated cluster. This look is particularly suited to garden ceremonies, spring celebrations, and lace gowns. A light veil can also be positioned beneath the bun while leaving the braided details clearly visible in photographs.
Conclusion: Flattering Wedding Hairstyles
The right bridal hairstyle can bring your entire wedding look together, from the neckline of your dress to your veil, earrings, and overall mood. These ideas give you plenty of inspiration while helping you think about comfort, texture, hold, and the setting of your celebration. Flattering wedding hairstyles are not about copying one perfect look; they’re about finding a style that feels beautiful and genuinely suits you.
Save this post on Pinterest so your favorite ideas are easy to revisit, then try one or two before the big day to see what feels best. Share this guide with another bride who needs fresh inspiration, and enjoy creating a look that makes you feel confident and unforgettable.